
Identify the detail, movement and material interactions before separating local repair from renewal. Sheet selection and dimensions should come from the current project specification, while cost follows the defined scope and access.
Specify the junction, not a generic patch
- Identify the lead detail and its drainage function before naming a repair.
- Inspect movement, fixings, substrate, adjoining masonry and concentrated water flow together.
- Use the current project specification to select sheet dimensions and detailing; do not apply a generic code number from an online summary.
- Treat lead exposure, work at height and protected-building consent as separate control questions.
Recognising what the leadwork is doing
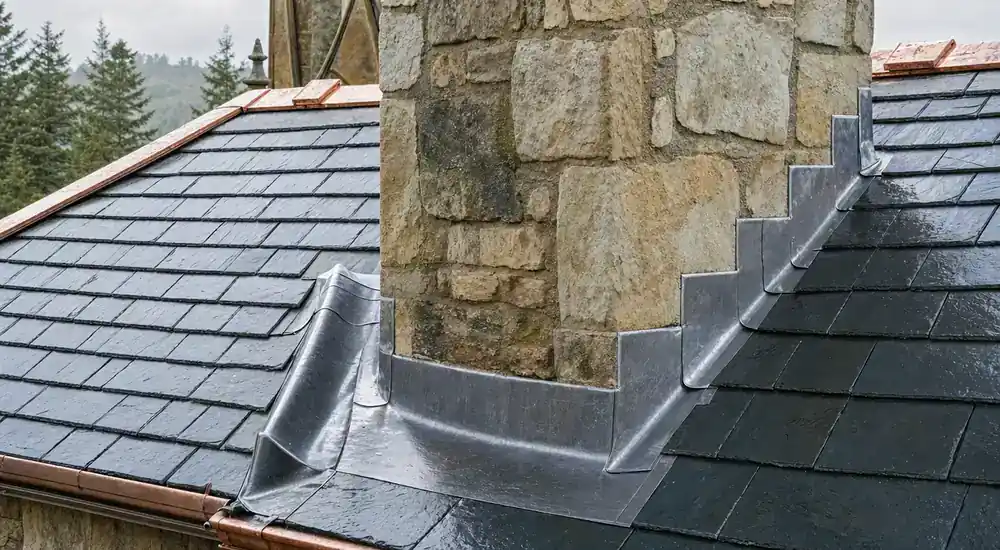
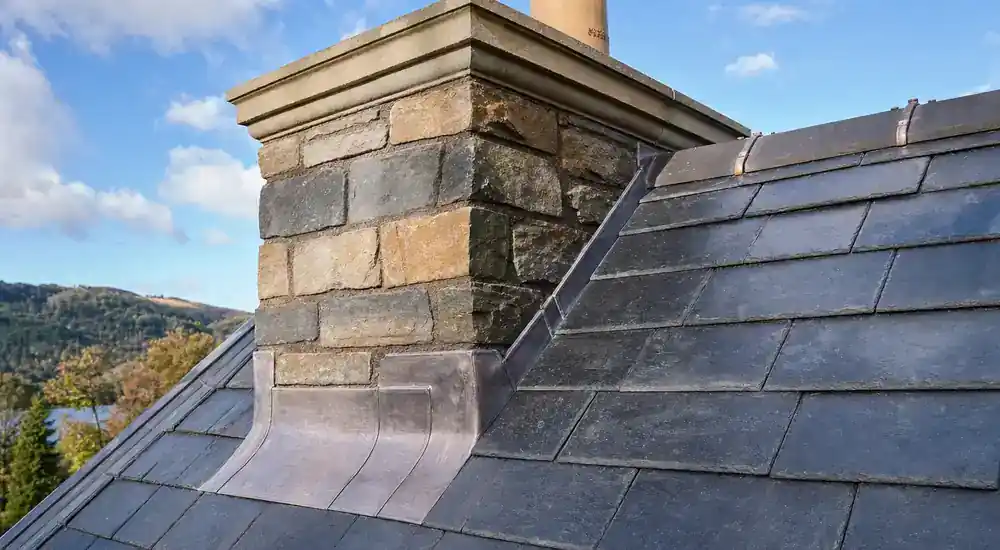
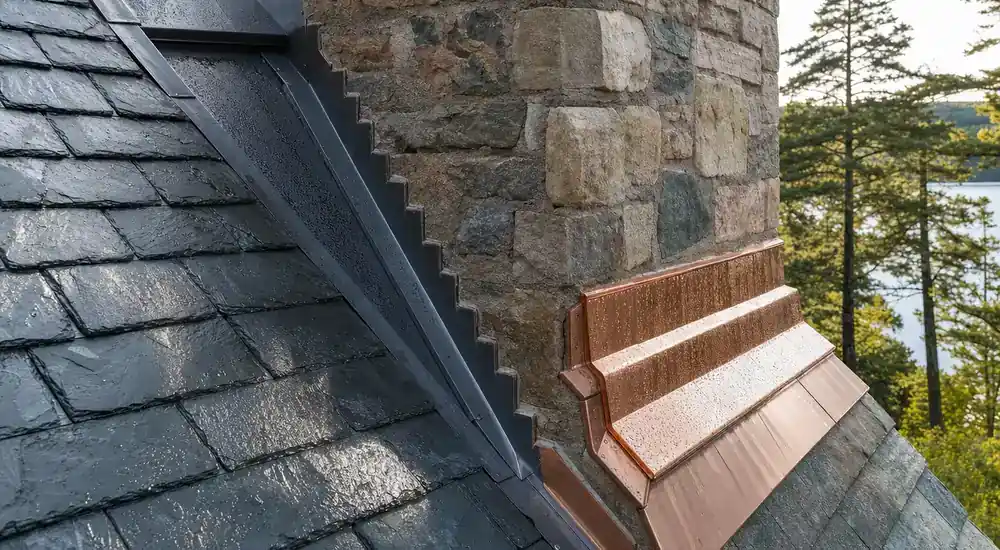
The Engine Shed describes leadwork as both a barrier at complex junctions and a way to channel water. Start by naming the detail and tracing where water should arrive and leave.
Flashings and soakers
Aprons, cover flashings, stepped details and individual soakers protect the meeting point between roof covering and walls or chimneys. Check how the visible piece overlaps adjacent materials and which parts remain concealed.
Valleys and gutters
Valleys, secret gutters and parapet gutters carry concentrated runoff. Their condition cannot be separated from falls, outlets, debris, sheet divisions and the surfaces draining into them.
Cappings and larger coverings
Parapet cappings, dormers, bays and other formed lead details may have several junctions and support conditions. Mark the exact affected bay or sheet rather than treating the whole elevation as flashing.
Read defect patterns and possible causes
Start with what can actually be seen. Engine Shed guidance identifies movement, distortion, corrosion, punctures, cracking, staining, loose fixings, biological growth and blocked outlets as matters for inspection.
Movement and restraint
Ripples, buckling, lifted edges or recurring cracks may indicate restricted movement, inadequate support or another detailing issue. A patch over the crack does not explain why stress formed.
Chase, fixing and masonry
Water may track behind lead where a chase, wedge, fixing or mortar joint has failed. Inspect the adjoining masonry and roof covering rather than assuming intact-looking sheet lead rules out the junction.
Corrosion and material interaction
Check staining, small holes, contact materials, timber, mortar and runoff from other metals or growth. The repair specification should address the source of interaction and any compatible barrier, not only the visible hole.
Drainage concentration
Ponding, debris and concentrated flow can expose weaknesses in gutters and valleys. Check outlet condition and upstream roof areas so drainage correction is not omitted from the repair boundary.
Inspect safely and report precisely
Leadwork is often positioned beside edges, chimneys, fragile coverings and rooflights. HSE guidance requires suitable work-at-height planning, and lead work also needs controls for occupational exposure.
Owner observations
Use ground level, a normal window or another established safe viewpoint. Take a wide location view and note internal marks, weather timing and fallen or displaced material without leaning out or stepping onto the roof.
What close inspection should cover
The inspection should check the detail type, sheet divisions, visible movement, fixings, support, chase or mortar, laps, drainage, contact materials and limitations. Where dimensions or concealed layers matter, the safe method should be clear.
Lead exposure controls
HSE identifies roof flashing as a construction use of lead and requires employers to assess and control exposure. The method should address tasks that create dust or fume, hygiene, cleaning and waste without inviting owners to cut or form lead themselves.
Choose local repair, partial renewal or redesign
The decision should follow sheet condition, cause, support and the ability to reinstate a coherent weathering detail. Avoid using material age alone as the deciding factor.
Local repair
A contained repair may be considered where the defect and cause are local, surrounding lead remains serviceable and the repair can accommodate movement and drainage. Set out the preparation, extent and connection to the existing sheet.
Partial renewal
Renew a defined bay or detail where cracking, distortion, corrosion or failed support is not sensibly addressed by a small patch. Show how sound adjoining lead will be retained and how the new work interfaces with it.
Detail redesign
Where sheet layout, falls, support, outlet capacity or incompatible contact repeatedly contributes to failure, the scope may need a revised detail. That design should be project-specific and, on protected buildings, checked against consent advice.
A project-specific lead specification
Lead sheet comes in different thicknesses and weights for different functions, but selection depends on the detail, sheet dimensions, support and current technical guidance. A generic online code table is not a safe substitute for the project specification.
Function and geometry
State the detail type, exposure, falls, sheet or bay dimensions, upstands, laps and outlet arrangement. Identify who is responsible for the design and which current technical information it follows.
Support, underlay and movement
Specify a smooth suitable support where required, compatible underlay or separation and a fixing arrangement that permits intended movement. Note any timber, mortar or metal that could interact with the lead.
Associated work
Cover chase preparation, masonry or mortar repair, slate or tile lifting, outlet work and reinstatement where the lead detail depends on them. Make exclusions explicit so the proposal does not leave a weathering gap between trades.
Handle heritage and consent questions separately
Lead is common on traditional Scottish buildings, but the planning authority decides whether a proposed change requires consent. Do not claim that one material is always required or automatically exempt.
Retaining existing lead
Note the form, visible profile, decorative detail and reusable material. Historic Environment Scotland advises repair that respects traditional fabric and compatible materials, with cause found before symptoms are covered.
Changing the material or detail
Show the existing and proposed material, appearance, geometry and reason for change, then ask the planning authority about listed building or conservation requirements before work that may affect character.
Official guidance and references
- Engine Shed: roofing leadwork Historic Environment Scotland guidance on lead junctions, movement, defects, maintenance and repair specification.
- HSE: lead in construction Official guidance on assessing and controlling occupational exposure to lead in construction work.
- HSE: roof work Official roof-work guidance covering safe access, roof edges, weather and fragile materials.
- HSE: working at height safely Official guidance on planning, competence, equipment and the hierarchy for controlling work-at-height risk.
- HSE: fragile surfaces Official guidance on treating roof surfaces as fragile until a competent person confirms otherwise.
- Historic Environment Scotland: traditional building repairs Official guidance on finding causes, specifying compatible repairs, retaining fabric and recording work.
- Historic Environment Scotland: traditional building maintenance Official advice on inspection plans, connected defects, maintenance records and safe observation of traditional buildings.
- Historic Environment Scotland: listed building and conservation area consent Current Scottish guidance on changes to listed buildings, conservation areas and the planning authority's role.